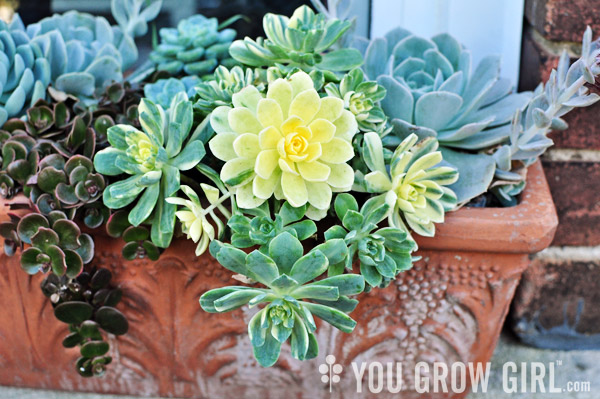
How to Make an Easy and Affordable Path (Part 2)

pathway1

Part 1 of this two part article can be found over here.

How to Make and Lay the Pathway

Step 1: Define the Path

I began this project two years ago so my path was already defined. To do that I laid down twine, and tied the ends to twigs to hold it in place. Some people use a hose to accomplish this, but I prefer twine because I can leave it in place and live with it for some time before committing to the final layout and pathway width.

Read more…

Leave a comment

How to Make an Easy and Affordable Path (Part 1)

pathway

When I moved in, the yard I inherited was barely more than a lumpy patch of “grass.” My theory is that the yard was once a vegetable garden that was left to go fallow and was eventually seeded without being levelled. It was extremely sloped in multiple directions, and full of large lumps and even larger potholes that I often tripped in while trying to walk across. Our goal for the space was to remove all of the lumpy “grass” and level the sloped yard as best we could to improve drainage. Digging it all by hand, shifting the soil, and building raised beds along the west side (where it is lowest) in addition to getting plants in on time, sowing seed, building a compost bin, etc was, quite simply, enough for one year. As a compromise, we made a pathway halfway up and left a small patch of “grass” at the back. In the second year we decided to change things up, extending the garden in front and moving the main entrance to the right. I also marked out new paths and smaller beds on the east side of the garden. By the time that was done, I was simply too tired to tackle that patch of “grass.”

This spring, as soon as the ground was workable, Davin and I were out there nearly everyday working away at that patch, digging it up a few inches at a time. We were determined that this would be the year that we would finally get it all out — no more hand-clipping the tenacious, miss-matched patch of this and that. No more stumbling and tripping in the potholes.

And we did it! Last Friday we got it all out and laid down a layer of mulch in its place. The following (broken down into two parts) are the ins-and-outs to how we did it.

Read more…

Leave a comment

Dyeing Fibre with Plants

Last summer I resolved to try and make further use of the plants that I grow by employing them as natural textile dyes. When their season was through, I did a few experiments, dying various fabric scraps with the burgundy leaves and immature blooms of the large false roselle plants I had grown that year. Unfortunately, time quickly slipped through my fingers and the other plans I had in mind did not come to fruition.

This winter I have made a dramatic shift back to embroidery and my brain is consumed with thread. Recently, in preparation for the growing season, I have returned to experimentation, but this time I am dyeing threads rather than fabric.

Read more…

Leave a comment

The You Grow Girl Guide to Shopping for Seed Starting Gear at the Dollar Store

While I will always promote gleaning your gardening gear from the recycling bin or second-hand via garage sales and thrift stores, there are times when buying new is required. A lot of gardeners looking to save money have been turning to the dollar store over the past few years, especially since many chains have been expanding their gardening aisles and selection has grown. For that reason I have put together a guide to products that I have purchased in my local stores and have found to be useful and of decent quality. Oddly enough, much of the best garden gear is not found in the actual gardening aisle so it helps to think outside the box and look around the entire store for objects in the housewares, craft, and stationary aisles that might suit your needs.

Recommended Products

  1. Plastic Dish Pan Basin: These bins are fantastic for a variety of purposes and I keep a few on hand. I use them to mix up and moisten seed starting soil (and other potting soils, too) and as a working surface for filling pots. They can also be used for bottom watering delicate plants and as a wash basin for soaking and cleaning used pots. Brand new cat litter pans also work well for this purpose, although the dish pans tend to be deeper.
  2. Read more…

Leave a comment

Botanical Display Cabinet

I can’t seem to help myself from bringing home plant bits from here and there whether its on a trip, out on a walk, or from my own gardens. I am in awe of the architectural shapes and designs found in nature and I want to have their beauty around me at all times of the year. It is the same with rocks, shells, and sticks. The world is full of beautiful and incredible things and I am constantly amazed by it all.

I bought this homemade display cabinet rather impulsively for $15 at the flea market a few months back. It’s meant to sit flat on a table rather than propped up as I have it now. Davin could not see its potential and wasn’t particularly excited about carrying it all the way to the car, but I persuaded him to give it a chance. I could see his point as the plexiglass front is scratched and worn from its original use as a flea market stall display (it sat flat on a table rather than upright), and the thing is awfully large and heavy. Still, I think he was eating his words once I got it set up and filled with random seedpods, leaves, and dried flowers we have collected over the years.

Read more…

Leave a comment