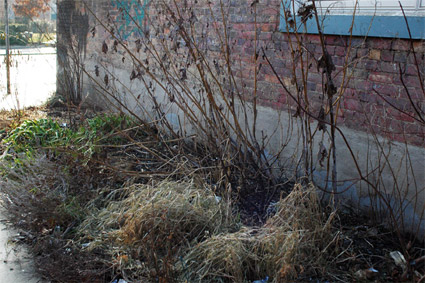
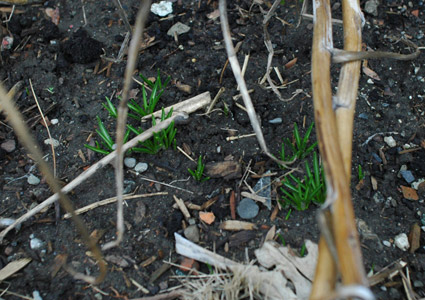
Fall Blooming Crocus

Photo by Gayla Trail  All Rights Reserved

Crocus pulchellus with a backdrop of freshly fallen Autumn leaves.

Leave a comment

Fall Blooming Crocus

Photo by Gayla Trail  All Rights Reserved

Crocus pulchellus.

Leave a comment

Soft and Orange

Photo by Gayla Trail  All Rights Reserved

This could be a ranunculus or something else entirely. Regardless, it sure is pretty.

Leave a comment

LaGuardia Corner Gardens

Photo by Gayla Trail  All Rights Reserved

Our off-time on a recent trip to New York City was spent wandering around soaking everything in and taking pictures. I didn’t go out of my way to visit specific gardens or community gardens this time, but naturally found some along the way.

Photo by Gayla Trail  All Rights Reserved

One of the community gardens I came upon was the LaGuardia Corner Gardens located in Greenwich Village between Bleecker and Houston Streets. I have come across this particular garden on past trips and have even taken some photos of it. I had a rough idea of where it was located and was pleasantly surprised when we stumbled upon it on our last day.

Photo by Gayla Trail  All Rights Reserved

Photo by Gayla Trail  All Rights Reserved

I’m not sure what it is about this garden that had me hoping to find it again. Maybe it’s the location, which is particularly interesting as the garden sits smack dab in front of a supermarket with a fence around it.

Photo by Gayla Trail  All Rights Reserved

There are several community gardens in New York City that are a good twenty years in the making. Through the years the landscape and socio-economic standing of the communities that surround them have changed, often times from poor to rich and from rubble to fancy metal and glass contemporary structures. As a result, these gardens and their gardeners always have an interesting story to tell.

Photo by Gayla Trail  All Rights Reserved

The history of LaGuardia Corner Gardens is your typical community garden story beginning with local residents digging a garden on barren, unused land, then fighting to keep the garden alive amidst a changing neighborhood.

Photo by Gayla Trail  All Rights Reserved

While I was taking photos, a woman came up to me and mentioned that a rooster had been spotted poking around in the garden the day before. She didn’t know where he came from or if he was still there. This exchange and information sharing is one of the things I enjoy most about photographing gardens. If you hang around long enough looking like you belong, someone is always bound to come by, eager to reveal the garden’s secrets.

Sure enough, as we made our way around the perimeter we eventually spotted him darting about, stopping now and again to take a bite out of a plant. I wonder if he is still there and how much of the garden remains!

Leave a comment

Extending the Harvest

Photo by Gayla Trail  All Rights Reserved

This piece was originally published in The Globe & Mail over the weekend as a part of my series on kitchen gardening.

Regarding using burlap and burlap sacks: Just to be clear, do keep them away from the crowns of your plants since they can get awfully heavy when wet. In fact, they are best used over the winter to prevent the erosion of large, open patches of soil from which annuals have been removed. Even better still, place the dead plant matter (browns) and some kitchen scraps (greens) underneath the burlap and you’ll have fresh compost on the spot come spring.

———————–

I love a fresh, crisp fall day. Many of us would agree that it would be the best season of the year if not for the fact that it is a stepping-stone to the inevitable: winter.

Who knows what this fall will bring given the wacky weather hijinx we’ve experienced this year. But let’s pretend for a moment that everything will go as planned and there won’t be snow sprinkled on the peppers tomorrow morning (please gods). We can’t control the weather or stave off the inevitable, but as gardeners there are a few methods we can employ to hold back the effects of seasonal change and keep the party going just a wee while longer.

You’re already one step ahead if your garden is a raised bed. They warm up slightly early in the spring and tend to stay warmer as the fall cools down. A thick layer of mulch such as straw, buckwheat hulls, or shredded newspaper keeps the soil and surface roots warm through nippy nights and breezy fall days. An actual blanket made of burlap gets the job done too, but can get awfully heavy when wet so be sure to cut big holes to keep it off the crowns of plants. An even better blanket still is black plastic. The dark colour attracts the sun’s rays and the plastic holds moisture through fluke fall droughts.

In lieu of cumbersome blankets, which can be difficult to maneuver in small spaces, or used alongside them, are an assortment of store-bought and homespun contraptions that can be fitted over individual plants or entire beds to trap warm air and create the effect of a miniature greenhouse. Hoop houses are toasty-warm tunnels made of metal or plastic hoops draped with a clear plastic tarp that let’s light in and keeps warm air from escaping. You can buy them ready made from garden suppliers such as Lee Valley or make your own inexpensively using bendable metal shaped into arcs or dollar-store hula-hoops cut in half. Push the arcs into the soil intermittently to support the length of the tunnel and cover with a big sheet of plastic. Secure the plastic in place by stapling to the sides of raised beds or with clips purchased at the hardware store.

Greenhouses made to cover individual plants are called cloches. Fancy glass cloches are nice to look at but expensive at about $30-40 a pop! Never mind, you can make as many as you like in a variety of sizes for free from plastic water bottles rescued from the recycling bin. Simply cut off the bottom and set the cloche over tender greens or frost-sensitive plants you’d like to keep in the garden just a little bit longer. Keeping the cap in place locks warmth inside, or you can remove it to water your plants and let heat escape on particularly sunny days.

Cold frames are the way to go if you’d like to get a shot at keeping particularly cold hardy greens such as mâche, kale, spinach, and arugula producing food straight through into the winter (and beyond). It’s really nothing more than a low-tech box with a hinged glass or plastic lid. The trick is to dig the box at least a few inches into well-draining soil and give it a south-facing position. Open the lid when it gets too hot, and insulate both the sides and top with newspapers, straw, and old burlap sacks when night temperatures drop below freezing. They’re not exactly practical when growing up on a roof or in pots but compact versions set on top of a planter box will ensure at least a few extra homegrown salads this fall.

Leave a comment