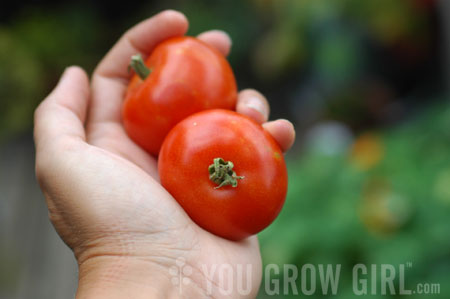
Update on the Morelle de Balbis

Photo by Gayla Trail  All Rights Reserved

When I wrote about the Morelle de Balbis (Solanum sisymbrifolium) last it was on April 30, 2010 when the seedling was still living in the greenhouse. It had just begun to produce its thorns and I was beginning to get a glimpse into what I’d signed on for.

It is now July 1 and the plant has been living outdoors in soil for just over a month or so. When it came time to plant, I decided to grow it in a large pot, rather than in the ground. The final mature growth of this thorny Tomato Family plant is estimated to come in at around 5′ tall. I had a feeling it was going to be fairly treacherous to grow. Planting it into a garden bed meant there would be a greater chance of scratching myself on the thorns. I am not a particularly graceful person. I bash into door frames fairly regularly. I live in small spaces and I garden in cramped quarters, which means I regularly come into close contact with plants whether I want to or not. As the Morelle de Balbis grows it becomes more and more apparent that this is not a plant I want rubbing up against my skin.

Photo by Gayla Trail  All Rights Reserved

Shortly after planting. I used straw mulch to help lock in moisture and keep weed seeds from sprouting.

I did not have any room left in the big pots on my roof, so I decided to plant it in a container in “the new space.” Oh, didn’t I tell you? There is a FOURTH garden this year. The fourth is a yard share, located through a secret door in the back garden of friend. One of my goals for this year was to get a bigger garden space. And when it didn’t happen through the City allotment garden network, a friend stepped up and asked me to join their space. I am so grateful.

Photo by Gayla Trail  All Rights Reserved

With other gardeners in the space, I had to be especially mindful of this plant’s placement. As a part of the garden’s revamp in the spring, we decided to make use of a sunny spot along a fence by lining up large recycling bins for container growing. I planted the Morelle de Balbis in the furthest bin along the fence where I hoped it would receive minimal contact.

Photo by Gayla Trail  All Rights Reserved

About a month after planting. The Morelle de Balbis is in the centre and is flanked by two determinate tomato plants: ‘Black Seaman’ and ‘Whippersnapper.’ All are under-planted with different varieties of basil.

Read more…

Leave a comment

Hanging Colander Lettuce Pot

Photo by Gayla Trail  All Rights Reserved

You are looking at one of this year’s serendipitous brainstorms. I feel perhaps a little bit too genius for coming up with it, when really, it’s just an enamel colander filled with ‘Sea of Red’ cutting lettuce and hanging in a wire basket. I quite like it. So much so that I haven’t had the heart to harvest it! Yet.

Here’s how this happy marriage came about. I had this heavy wire hanging basket sitting around, going unused. It’s the sort that is typically lined with coir, which is fine in most gardens but hard to keep hydrated on a hot and sunny roof. While, I’ve found it difficult to use as-is, I’ve kept the basket waiting for a new use to present itself. Despite the issue with hydration, stylishly understated and black hanging baskets made of a sturdy materials are hard to come by so I wasn’t about to get rid of it.

I bought the colander at a local secondhand store with the expressed purpose of growing greens in it. I liked the pairing of butter cream with bright red trim. The holes are small enough to hold soil without adding an extra liner, and the drainage they provide is perfect for growing small greens or herbs.

Photo by Gayla Trail  All Rights Reserved

Once I had planted up the colander, I thought it might be better served sitting up off the ground. Low and behold it fit perfectly inside the otherwise useless wire basket. As an added bonus our digging mammal visitors (squirrels, raccoons, etc) have not been able to get at it, while a second pot of ‘Sea of Red’ cutting lettuce has been dug up several times over the season.

Incidentally, I have experimented with this particular variety by growing the heads spaced at a distance from one another and tightly clustered as you see it here. I prefer it grown together and like the way the spear-like leaves create a literal sea of rich, mahogany that lights up when the sun hits it just so. It’s as satisfying to look at as any flower basket I have grown and I might even eat it for lunch sometime soon before the plants bolt.

Leave a comment

Growing Beans

Photo by Gayla Trail  All Rights Reserved

My second article of this season’s Globe & Mail column was published last Saturday: BEANS! It’s still not too late to get started. When I wrote and submitted the article we were experiencing a very hot and dry spring: great weather for planting beans. Immediately after the article was published the weather turned cold and wet: not so great weather for planting beans. What? Regardless, the beans I planted are popping up through the soil and look great. No rot or germination problems. Get those beans going!

Oh and if you’re wondering what I narrowed it down to: ‘Royal Burgundy’, ‘Dragon’s Tongue’, ‘Trionfo Violetto’, and two types of ‘Yard Long’ beans (green and ‘Red Noodle’). Basically everything I wrote about in the article. Writing the articles tends to renew my own excitement about plants or specific varieties I haven’t grown in a while.

Photo by Gayla Trail  All Rights Reserved

This is me back in January in St. Lucia standing next to a gigantic tripod of ‘Red Noodle’ beans and holding one up against my arm for length.

———————-

While I’m on the topic of the Globe & Mail: I’ll be doing a live web chat tomorrow, Friday, June 11 at noon EST over here.

Read more…

Leave a comment

Grow ‘Sparkler’ Radishes in a Container

Photo by Gayla Trail  All Rights Reserved

The first new radishes have been making their way into our salads over the last week — what a treat! First up is ‘Sparkler’, a tender, two-toned variety that reminds me of a flattened ‘French Breakfast.’ The later is long and elegant but only appropriate for the very deepest containers, while ‘Sparkler’ is short and squat, perfect for window boxes and smaller pots.

Growing Radishes:

The trick to growing tender radishes in pots is to keep the soil moist, but not soggy. Dry soil turns out small, woody radishes. Deeper containers are easier to keep moist. If you are having trouble growing decent radishes, try supersizing your container and growing a smaller variety.

Photo by Gayla Trail  All Rights Reserved

This year I am experimenting with a big wash basin that is about 8 1/2″ deep by 18″ wide. I made lots of holes in the bottom of the container with a big nail and a hammer before filling it with potting soil. I then planted the seeds in concentric circles within the container, spaced about 2 inches apart so the radishes would have room to grow. Approximately 20 or so radishes can grow in there at one time — I could have fit a few more had I not sown a patch of wild arugula in the center for the heck of it.

More About Radishes:

Leave a comment

Tripod and Pea Staking

Photo by Gayla Trail  All Rights Reserved

Staking is one of those topics that I was sadly unable to cover in the Grow Great Grub book due to space considerations. I covered it pretty thoroughly in You Grow Girl and I have to say that years later, and having experimented with other methods, my go-to cheap and cheerful method both in the ground and in containers is still the tripod. I find it exceptionally stable, especially on my roof where the spring and later fall winds can turn epic. It is also the cheapest and most accessible — most of us can find a source of long bamboo poles close to home for less than a dollar per pole. I have even found the occasional multi-pack at the dollar store for even less.

    The tripod method is simply 3 or 4, or sometimes more, bamboo poles (branches work well too) set into the ground at an equal distance around a plant or within a container and then pulled together at the top and held in place with a strong piece of string or wire.

1cg_aug25.jpg

I have fashioned riffs on the tripod for tall plants and climbers including tomatoes, sweet pea, morning glory, pole beans, peas, and cucumbers. I add string or other supports depending on the type of plant I am growing. In 2007 I grew 16 tomato plants and several cucumbers by building 4 sets of 4 tripod stakes supported by 4 poles around the top as cross beams. The added support proved to be unnecessary and drove us nuts all season long as we continuously (and painfully) ran into those stupid cross poles with our necks and heads. A single indeterminate (vining) tomato plant was supported by each pole and I strung mesh along one side that supported the cucumbers and gherkins. You can read more about that over here.

p.s. That’s the ‘Variegated’ tomato in the foreground/left. You can just make out the white splashes in this small photo.

I have even made smaller versions using shorter poles to prop up heavily laden bush beans.

But I didn’t intend to talk about tripod staking today so I’m not sure why I am preambling with that. Today’s topic is pea staking. Of all of the easy, or what I coined “artfully lazy” methods in You Grow Girl, I like pea staking best, most especially when it comes to propping up it’s namesake: peas.

    Pea staking is as simple as locating a bunch of twiggy branches (messy end growth with plenty of small twigs and branches) and then setting them into the soil with the solid end down. Next, plant your seeds in and around where you have set them into the soil and wait for the climbing plants to hitch on and eventually cover the branches in greenery.

This method works both in the ground and in pots. While bare, it appears orderly and decorative in pots, but can just look like a bunch of branches stuck in the ground if used in a large, empty garden bed.

Photo by Gayla Trail  All Rights Reserved

Last year, while walking home from the greenhouse, I came upon a large bundle of bright red, freshly cut dogwood branches. I had about a minute to brainstorm projects I could make with them and whether or not it seemed worth the effort to drag that bundle all the way home. In the end I decided that the dogwood was beautiful and chances were good that I might never come across sidewalk gold like that again. I walked a treacherous gauntlet back to my abode, and despite nearly poking the eyes out of hundreds of hipsters and small children, I was right, they were worth it. I haven’t seen a bundle of any branches, let alone dogwood branches that nice since.

I used all of the branches up; some in big pots as below and smaller branches in smaller pots. They made the pots look like something was happening while they were empty, and the red provided a beautiful contrast with pale green pea plants as they entwined themselves in the branches.

Here’s how it looked when the peas were fully mature. I believe this pea variety is ‘Carouby de Maussane.’

Photo by Gayla Trail  All Rights Reserved

Leave a comment