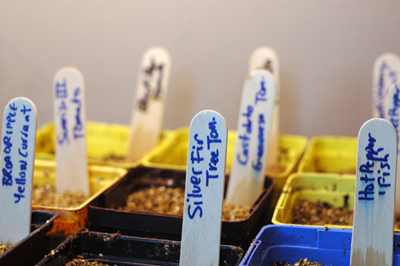
Project The Best and Most Ass Kicking the Roof Garden Has Ever Been, EVER 2008

Photo by Gayla Trail  All Rights Reserved

While the street garden and the community garden plot are both merrily on their way the roof is a disaster. I started an assortment of edibles a while back amidst the chaos with the intent of organizing it, and then didn’t. When the local television stations starting calling about coming to shoot the garden for various growing season has begun segments I knew I did not want to find myself profusely apologizing for the lackluster show like I did last year.

“Hello. Welcome to my assortment of random empty containers. Please avoid pointing your camera in this direction, and that one, and while you’re at it you might want to crop out that pile of junk to your left.”

That’s the problem with a small space, there are no hidden spots to tuck away and hide the mess. Just everything out on display all the time. And so Project The Best and Most Ass Kicking the Roof Garden Has Ever Been, EVER 2008 was launched this afternoon and let me just say, it really is going to kick even harder than ever this year! Or something.

Photo by Gayla Trail  All Rights Reserved

On our way back from lunch I had the sudden impulse to transform an old metal frame into a chalkboard. We stopped at the local art store and picked up some Masonite. As soon as we got back Davin got on the job, transforming what was once an over-the-top framed 3-D hologram of Jesus that I had garbage-picked on a night stroll years back into a place for us to draw pictures. The drawing you see in the photograph is tame, embarrassingly quaint really in comparison to some of the images that first graced the board. I wish I had photographed those, although I am sure there will be plenty more like them in the future.

The project started out on a whim but once it was done we all agree that a place to draw and doodle outside is one of the best non-plant additions to the roof garden ever.

Leave a comment

Early Days at the Community Garden Plot

Photo by Gayla Trail  All Rights Reserved

Last fall I decided to participate in a national growing experiment called, The Great Canadian Garlic Collection, wherein hundreds, possibly thousands of gardening nerds are growing garlic, recording their results, and then pooling the data so we can all find out which varieties grow best under varying conditions. Believe me when I say that it is all VERY important work and I have taken my role as a participant very seriously. In fact I am taking it all so seriously that it has forced me to change my evil, too-open-to-suggestion-and-last-minute-changes ways by making a garden plan.

Last fall, when the garlic arrived in the mail, I knew I would not be able to do what I usually do which is just stick it wherever it will grow and forget about it until spring. I had to keep track of the garlic, the varieties I am growing, and then record my observations over the span of two years. For the first time ever I needed a serious plan. A plan that can’t be changed on a whim. A plan committed to paper.

And so I decided to make an experiment out of this experiment. I decided to try growing a slightly more formal garden at my community plot than is my way. My way is generally one based on informal companion planting. I grow plants in groupings that work, share, look gorgeous, and love together but I don’t get hung up on formally arranging things. I enjoy a bit of organization and try to keep chaos at bay in other areas of my life, but since the gardens aren’t so much my spaces anymore as they are work spaces, I try to leave a little space for serendipity to take hold. I do not use rulers or string. I do not mark space. I do not make a design on paper that can then be implemented in the earth.

But like I said all of that had to change with the introduction of the very important garlic. And so I set about making a plan last fall. I came up with a design and I set to blocking off the garden using sticks and string as markers. I planted the garlic, recorded its locations, drew in the herbs and perennials, finishing off with carefully marked blobs for spring plantings.

Photo by Gayla Trail  All Rights Reserved

And then in a telling Freudian slip, at the very moment I needed to place my early spring seed orders, I lost the plan. My subconscious did not want to be told it can only grow 4 tomato varieties. My subconscious was gonna grow those ‘Chocolate Cherry’ sunflowers formal plan be damned! I searched high and low but it was gone for good. I went ahead and ordered the seeds without the plan.

In the end it wasn’t a big deal, although as always I have far more seeds than I can grow. The overall layout was still marked off with string at the garden. Garlic sprouts have emerged from the soil with accompanying tags indicating the varieties. The perennials are marking their space, leaving me with empty pockets to fill with the seedlings I started under lights a month or so ago.

Photo by Gayla Trail  All Rights Reserved

And despite the formality there is still plenty of space for serendipity and last minute inspiration. When I went to do clean up on the garden last week I had the impulse to build a sculptural trellis to grow peas and beans on. I am overstocked on attractive pea varieties and thought it would be nice to grow them in the community plot this year. The community garden is surrounded by weed trees that require aggressive pruning every year less we lose sunlight to the garden entirely. I used some of those prunings to build a gnarly tripod trellis, reinforcing it with woven branches at the base. I’m rather fond of it. It is going to look gorgeous covered in peas, if the groundhog doesn’t get to them first!

Photo by Gayla Trail  All Rights Reserved

Leave a comment

Thrifty Ugly Bucket Camo

Photo by Gayla Trail  All Rights Reserved

The discussion around inexpensive containers for indeterminate tomato plants in a recent post has brought up a good point regarding how to conceal the clinical blandness of food industry buckets. The conversation in that post reminded me of a brilliant camouflage technique I discovered on a Saturday walk through my own neighbourhood a few years ago. I have shown this image during several presentations yet it did not occur to me to share it here. I’m not sure who the gardener/designer is although I’m fairly certain it is connected to the small restaurant that is located at this intersection. Whomever they are, what they have done to transform this corner with very little money is brilliant. The tomato plants seen in the foreground are growing in your average industrial food industry bucket but has been concealed using cheap bamboo blinds.

Photo by Gayla Trail  All Rights Reserved

Putting something like this together is incredibly easy and very nearly free. The blinds are cut to size, wrapped around the container, and secured in place by wrapping string around everything and tying a knot. Try securing with wire first and then covering it up with string if you’re concerned the twine won’t hold on its own. Jute is a very affordable but weak string. It can be replaced with a stronger twine made of cotton or sisal. All kinds of decorative options are available in abundance in the curbside economy. Replace bamboo curtains with wood curtains, grass beach mats or any combination of discarded natural fibre rugs, mats, or blinds.

These materials will probably only last a year outdoors but at least you have given them another year of life out of the landfill. By the end of the year they may even be weathered enough to break into bits and put into the compost bin.

Photo by Gayla Trail  All Rights Reserved

Another trick I employ when I can’t find anything to disguise ugly containers is to surround them with prettier pots. Organize larger, utilitarian buckets and garbage bins at the back of the arrangement, placing smaller, decorative pots with attractive plantings of pretty flowers and brightly coloured heirloom veggies in front. If the smaller pots are too short raise them up using larger decorative pots turned upside down as props. Make shelves out of bricks and discarded pieces of wood and then disguise that layer behind a lower tier comprised of smaller pots that sit on the ground. This tactic can be a little bit labour-intensive over the course of a growing season since it requires rearranging as the plants expand and grow. But containers generally require rearrangement for this reason regardless.

The fluidity and possibility for change that comes with container gardening is a positive that big money designers use to their advantage. While most of us can’t afford to swap out expensive containers for new expensive containers on a whim, with a little ingenuity and creativity any of us can fancify ugly buckets or simply rearrange pots to improve the overall look of our container gardeners.

Leave a comment

Over-wintering Hot Peppers (Part 2)

variegata_pepper.jpg

Earlier this Fall I wrote about bringing your hot pepper plants indoors for overwintering. I’ve put together a short 2 minute clip showing how I dug up a ‘Variegata’ hot pepper plant from my community garden plot and transplanted it into a pot to spend the next 7 or so months indoors.

There are lots of different ways to over-winter peppers — some take space into consideration and involve pruning the entire plant back and storing in a cooler location, while the method I am using is about enjoying attractive plants as houseplants until they can be put back outdoors in the late spring to begin a new season of pepper production. By my method your plant isn’t likely to produce fruit during the cold months but should produce lots of pretty foliage to look at.

    Here are a few extra tips:

  • Soil: When transplanting from and in-ground garden gently remove as much soil from around the roots as possible and transplant into a container of potting soil. The soil from your garden will become compacted in a pot, eventually smothering the roots and preventing drainage and air circulation.
  • Fertilizing: Peppers do not require much in the way of fertilizing. Be very sparing and apply fertilizers that are slightly higher in nitrogen keeping in mind that the goal is to produce healthy leaves, not bare fruit. I think a sprinkling of vermicompost at transplant time is just enough. Anything too high in nitrogen will enourage a lot of leggy, tender growth, just the kind of foliage aphids are most attracted to.
  • Pests: And while we’re on the subject of aphids, chances are you will get a few or a lot this winter. A good spray in the shower or kitchen sink is the best chemical-free way to get them off your plant for good. So is keeping your plant as healthy as possible.
  • Peppers like sun and warmth: Keep your plant in the sunniest window you’ve got. If the windowsill gets too cold and drafty move your plant as far away as possible while still providing optimum light. If that’s not enough try setting them underneath grow lights. You can also try setting your pepper’s pot on a crocheted windowsill cozy or pot coaster. Heating mats are great too but I usually wait to bust mine out until closer to the start of the growing season, otherwise the warmth prompts the plant to get active before the light is bright enough to sustain that level of activity.
  • Peppers Prefer a Bit of Drought: Water less often then you would outdoors — with less drying heat and light your plant will require less moisture. Peppers like a bit of drought so test the soil with your finger first to see that it has dried out slightly before giving it a drink.
  • Shock: Some leaves will turn yellow and drop off shortly after transplanting or bringing indoors. This is quite normal. If this continues, prune back bare branches and remove any remaining fruit and flowers so your plant can concentrate on producing foliage, not reproducing. You should see some fresh leaves spring up in the coming weeks. I’ve had peppers that looked to be on their last legs come back strong as soon as the warmth and sun came back in the spring. Give your plants some time, it will be worth it for that early season bumper crop. Of course some plants just don’t overwinter well, period. Give it a go, if it doesn’t work out chalk it up to experimentation and move on.
Leave a comment

The Great Canadian Garlic Nerd Fest

garlic_great.jpg

I recently became an official card-carrying member of Seeds of Diversity, a move that was a long time coming. Okay, to be honest there is no actual membership card but there really should be — I am a proud nerd who loves the idea of a special membership card to a club of similarly-minded nerds. A button or t-shirt would be nice too. A patch would be great. I might consider wearing a special pair of gardening gloves if they were available. A hat would be pushing it.

Last Friday I received my first official membership email. Inside was an invite to take part in a national garlic-growing project called the Great Canadian Garlic Collection. Here’s how it works: members choose 3 varieties of garlic to grow (one variety called ‘Music’ is the control and everyone must grow that variety). Members grow these varieties for two years documenting their progress by filling out forms and making careful observations. Eventually the data will be collected providing Canadians with information about which varieties grow best under varying conditions so that gardeners can choose the best varieties for their area. The best part — the garlic is FREE!

Free garlic just when I was starting to consider my garlic options for the year AND I get to fill out pseudo-scientific forms AND be a part of a special very important project in a very important special peoples’ club…. I was so all over the idea that I was literally racing to choose my varieties and get the request off via email within minutes of receiving the invite. My heart was racing a mile a minute as I yelled across the room at Davin, “Would you prefer a variety that roasts well or has nice pink stripes? Which should I choose, ‘Persian Star’ or ‘Inchelium Red’? What should I choose? Help!” What if I was too late to take part? What if they ran out of garlic before receiving my request? What if my email was in a long queue behind thousands of other eager participants? What if they don’t want an urban gardener? All week long I’ve been telling friends and anyone who will listen about the project. An email confirming my participation came as a sigh of relief. And then yesterday my garlic arrived in the mail!

garlic_varieties.jpg

‘Music’ is the control. Everyone has to grow it. I chose ‘Siberian’ because it is supposed to be a hardy purple variety and ‘Persian Star’ because it is good for roasting and so darn pretty with dark reddish/purple stripes and pointy cloves.

garlic_bags.jpg

And now comes the hard part… something this official requires that I keep track of the varieties, documenting which varieties I grow and where. Some people are hyper garden planners, I am not. I make open-ended decisions about the plants I will grow, the methods I will explore, the changes I will make to each space, and then I throw it all out the window at the last minute and mostly wing it. Some things are set in stone ahead of time but I try to keep those to a minimum so I can be open to something better that comes along last-minute. I hate being locked down into anything and prefer to go with the flow when the season starts. Keeping track of three different garlic varieties that need to be planted NOW means that I’ve got to make some sort of plan for spring. In the past I have planted my garlic crop in the Fall, working with and around that haphazard planting come spring. I often keep my garlic to the perimeter of my community garden plot to make things easier. I do pretty much the same thing with the onions and always have the option of pulling anything out that gets in the way. This has never been an issue because I’m never growing either plant for a project like this and I’ve always got more in the ground than is necessary anyways.

So I’ve got some work ahead of me in the next few days. Some of it is fun and some of it is forcing me to push against my nature in a way that I don’t particularly like. I’d been toying with the idea of separating my plot into more obvious sections next year so I know it will be something along those lines. But I haven’t made definite plans about staking (I try new methods every year) or exactly how to divide those sections beyond working with the perennials that are already in place. Your suggestions are appreciated.

Leave a comment